Flutter App DevelopmentThat Delivers
Professional mobile app development with 5+ successful apps published on Google Play Store. Transform your ideas into beautiful, high-performance Flutter applications.
5+
Published Apps
100%
Client Satisfaction
2+
Years Experience
DesignDevelopmentBackend IntegrationDeploymentMaintenance & Support
Play Store.
Some of the Flutter apps I've built and published using modern tech stacks.
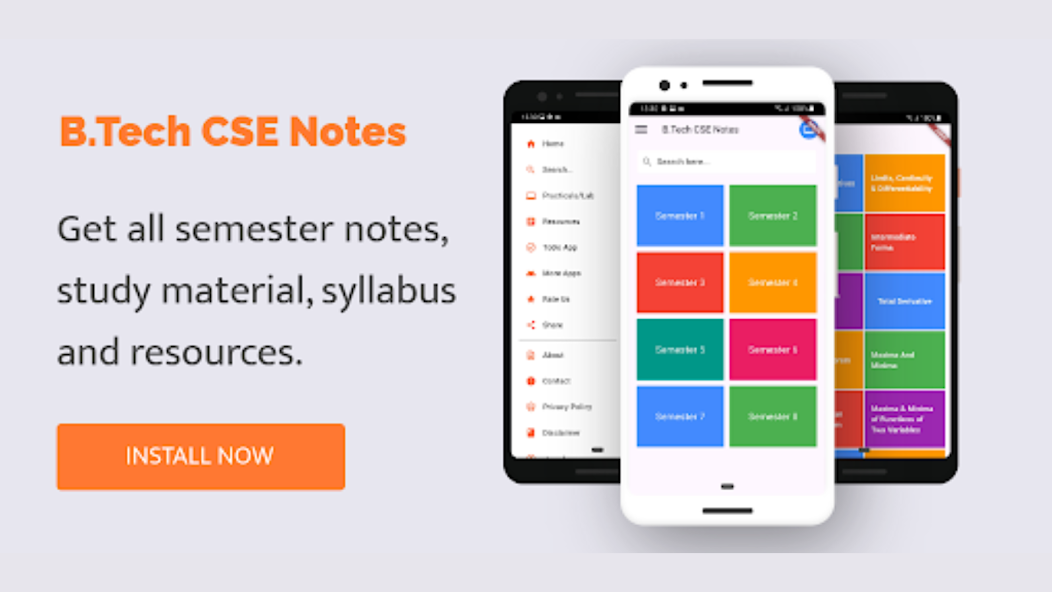
Online Learning App
E-learning platform built with firebase contains btech cse notes
FlutterFirebase
View Playstore →Chess Learning App
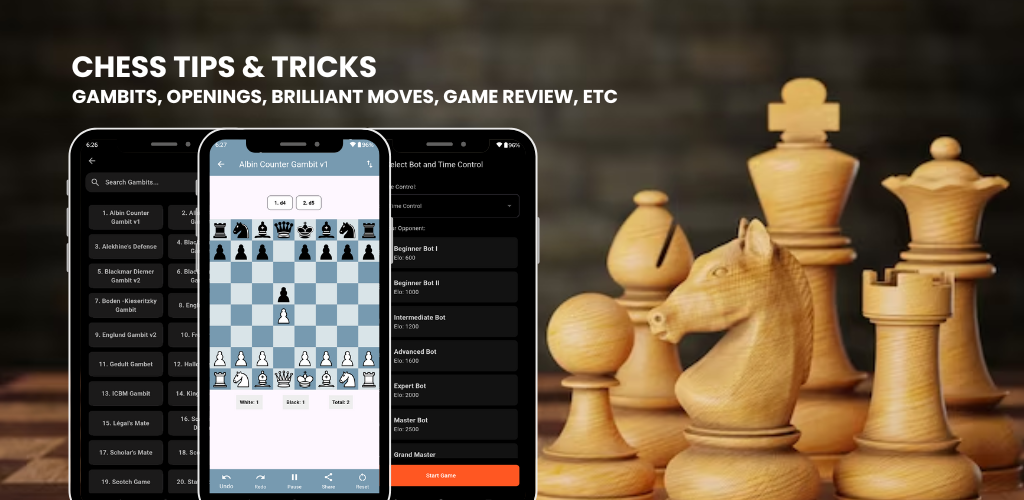
An interactive AI based chess learning app that provides strategies and tips for all skill levels.
FlutterFirebaseHiveStockfishProvider
View Playstore →
Wallpaper App
On-demand grocery app with delivery tracking and payments.
FlutterFirebase
View Playstore →Start Your Project
Want to build a Flutter app? Send me an email with a few optional details to help us get started faster:
Please include the following (all optional):
- Project Overview: What do you want to build?
- Budget: An estimate if possible.
- Tech Stack: Flutter + Firebase, or anything specific?
- Timeline: When would you like it done?
The more info you share, the better I can help!